Import Carrier Statements (Excel Statements)
The Import Carrier Statement (ICS) application is designed to automate the entry of commission payments from digital files. This feature supports Excel formats (xls or xlsx) as well as CSV files. If a carrier statement is only available in PDF format, users should instead utilize the Reconcile Carrier Statement tool.
Essential Import Rules
Before beginning an import, review these critical requirements and system behaviors:
- Required Data: You must map the Policy #, Billing Date, Premium, and Commission columns for a successful import.
- Column Headings:
- Excel: The first row does not need to contain column names; you can specify which row contains the headings during mapping.
- CSV: The first row must contain the column names.
- Missing Policies: If a Policy # is not found in the database, use the Create Policy button in the ICSE (Errors) screen to add it, then retry the payment.
- Multi-Carrier Files: While you must select a specific carrier to start, your file can contain multiple carriers if your mapping includes a Carrier Name column.
- Adjustments: The first payment for a policy in a specific billing month is recorded as the primary commission. Any subsequent payments for that same month are posted as adjustments.
- Reversals: Every import is named as a "session," allowing you to reverse the entire process if necessary via the Reverse Import Session menu.
Step-by-Step Import Process
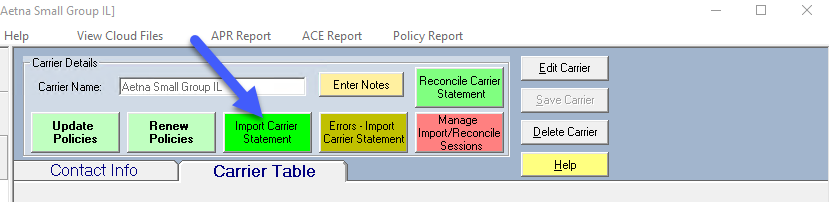
1. Select Carrier and File
Choose a carrier from your list and click Import Carrier Statement. You will be prompted to locate your file. For Cloud users, use the Paste box to upload the file to the server.
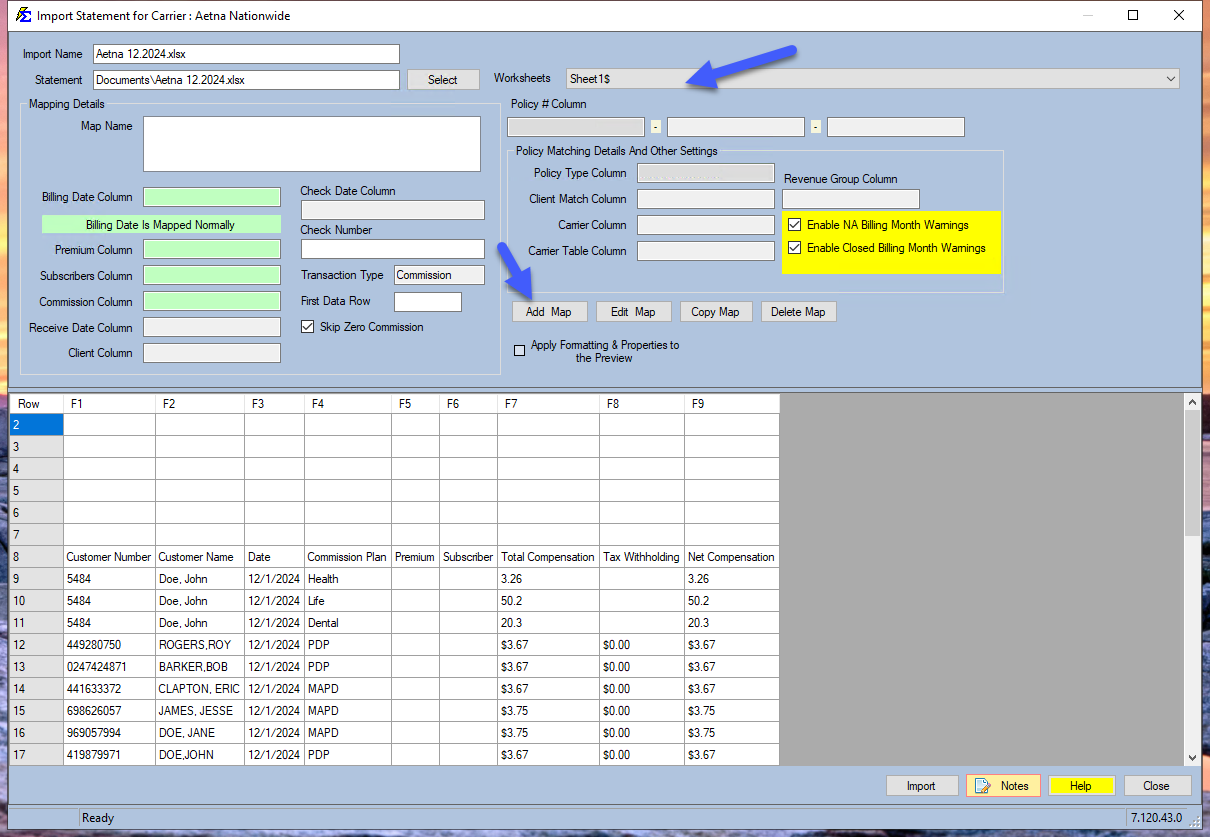
2. Define Column Mappings
You must "teach" the application which columns in your file correspond to the data fields in Commission Tracker. The system remembers these settings for future imports from the same carrier.
- Column Heading Row: Specify the row number containing your headers. ICS will highlight this row in green and ignore all rows above it, which are highlighted in gray.
- Add Map: Click this button to link required and optional fields, such as Receive Date or Check Number. You can save multiple distinct mappings for a single carrier if they provide different file formats.
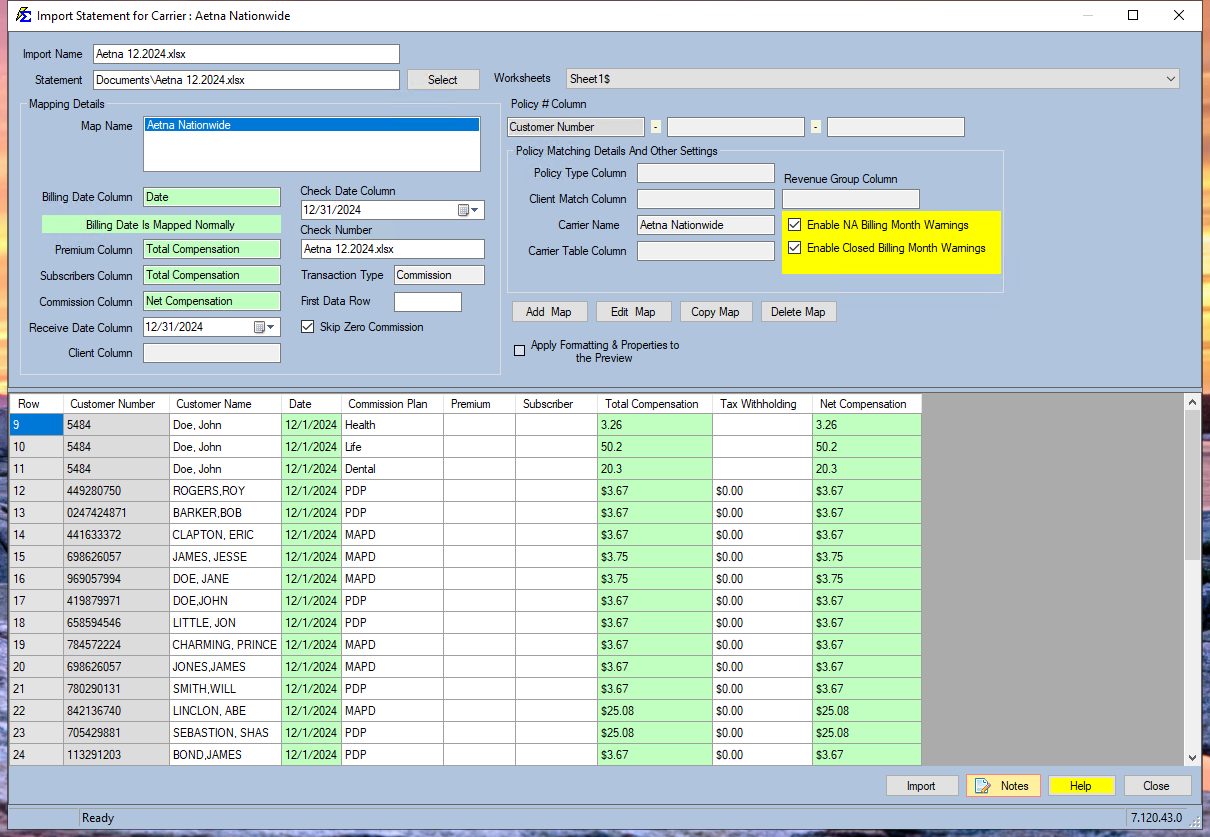
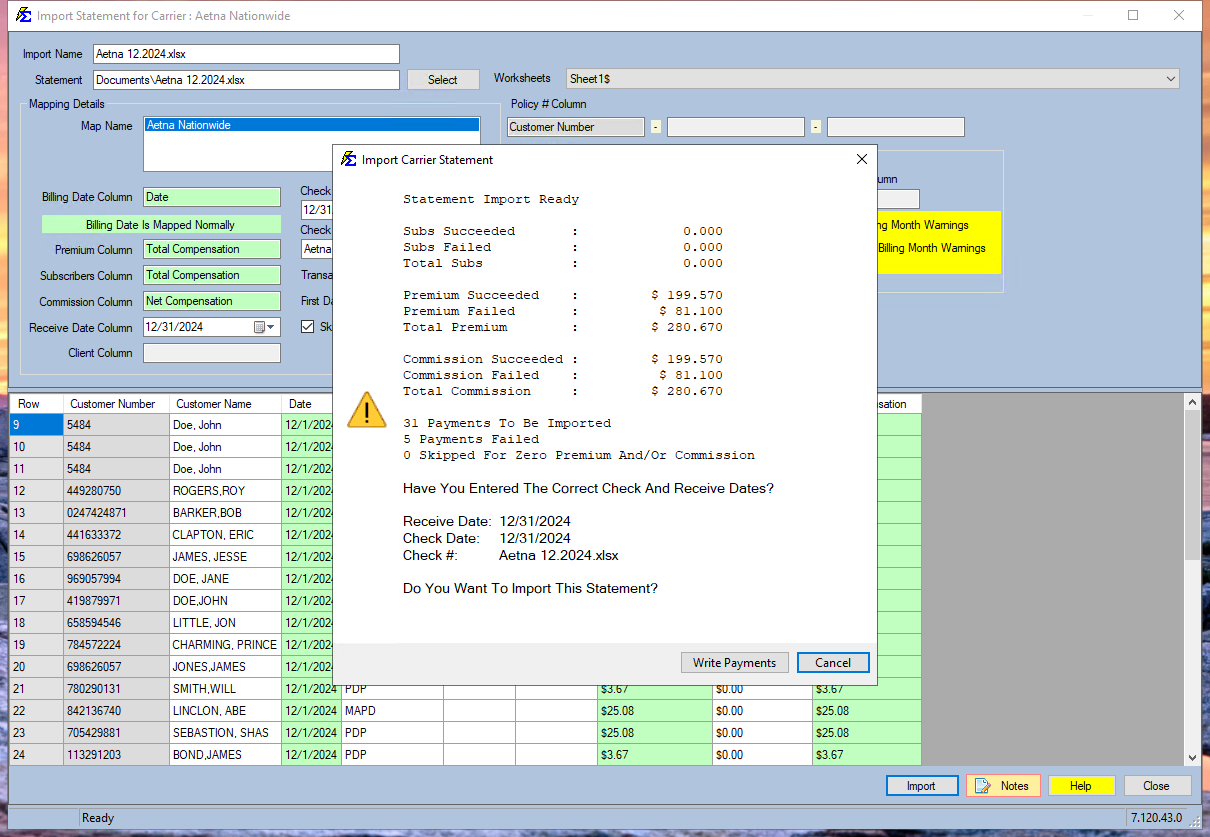
3. Finalize and Import
Once your columns appear in green, verify the Receive Date, Check Number, and Check Date, then click Import.
Post-Import Actions
Upon completion, the system displays an import summary. If you cancel an import mid-way, it is recommended to Reverse the partial session to maintain data integrity.
Managing Results
-
Resolve Errors: View a list of payments that failed to import (e.g., missing policies) and correct them in the ICSE screen.
-
Review Success: Generate a report of all successfully imported payments to verify against your statement.
-
Audit: Check the Agency Payments Received report using the Import/Reconcile filter to ensure total accuracy.
-
Reverse Session: Use the session manager to completely remove an import if errors were found in the source file.
Next Steps: