Selecting a File for Import
Commission Tracker Cloud uses a copy-and-paste upload system to move files from your local computer into the cloud environment before importing. Files are not browsed directly from your local drive.
💡 Why Use This
Cloud users cannot select files directly from their local computer during an import. This upload step is required any time you import a carrier statement, convert a PDF with PDFx, or upload any file into Commission Tracker Cloud.
🗺️ How to Access
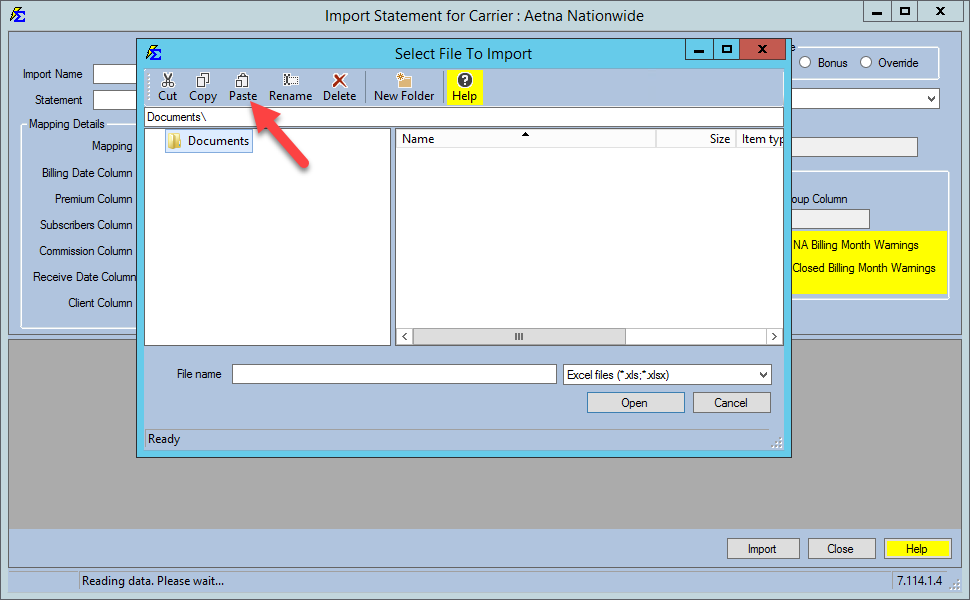
When you click Import Stmt on a carrier's toolbar, the Select File To Import window opens on its own. Its toolbar has the Paste button. (To open it again from the import window, click Select beside Statement.) The Cloud Files window on the main toolbar has the same Paste button.
Step-by-Step: Uploading a File
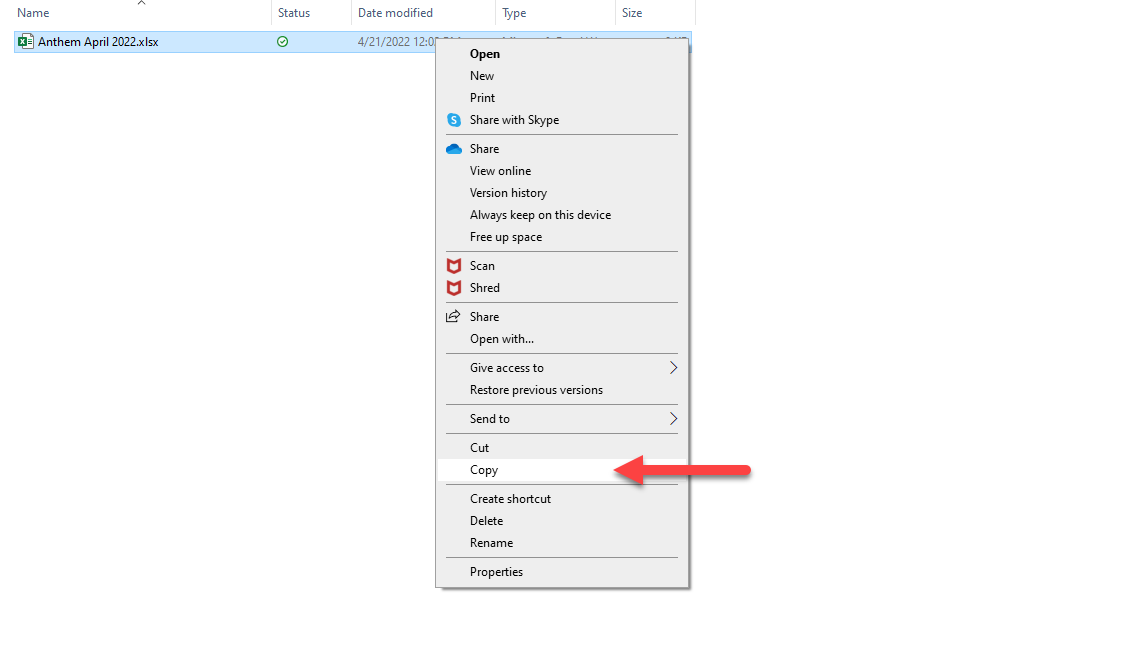
- On your local computer, right-click the file and select Copy.
- In the Select File To Import window, click Paste to upload the file to the cloud server.
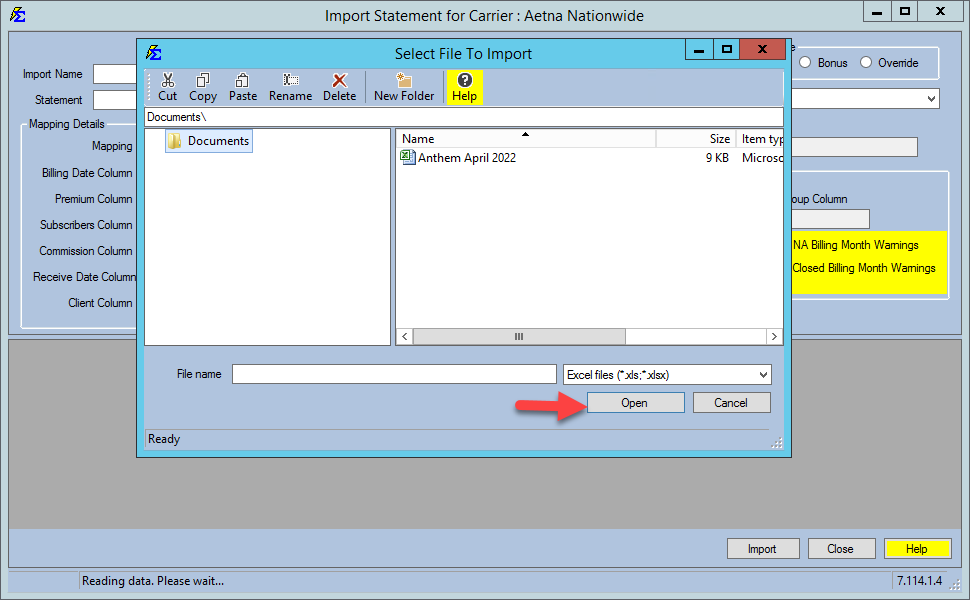
- Select the file from the list and click Open.
Supported File Types
Import Carrier Statements accepts .xls, .xlsx, and .csv files. Ensure your file uses one of these formats before uploading.
Managing Uploaded Files
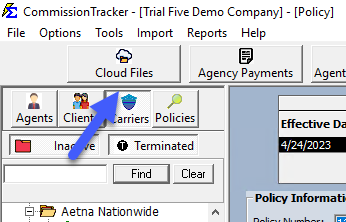
Click Cloud Files on the main toolbar to review, organize, or delete files you have previously uploaded to the cloud server.
🔧 Troubleshooting
The Paste button is not doing anything after I copy the file. Check the Clipboard box first. On Windows, copy and paste between your computer and Commission Tracker only works when the connection was opened with Clipboard checked in the Windows security prompt. Close Commission Tracker, connect again, check Clipboard and "Remember my choices for remote connections from this publisher", then click Connect. See Windows April 2026 Update – RDP Connection Changes (it also covers boxes that are grayed out). Then make sure you right-clicked the file on your local machine and selected Copy (not Cut), and click Paste in the Select File To Import window. If the file still does not appear, try copying the file again and repeating the paste.
My file is not appearing in the list after pasting. If nothing was pasted at all, check the Clipboard box first (see the entry above). Then confirm the file extension is .xls, .xlsx, or .csv. Files in other formats (such as .pdf or .numbers) will not appear in the import file list.
I accidentally uploaded the wrong file. Click Cloud Files on the main toolbar to locate and delete the incorrect file, then upload the correct one.
🔗 Related Topics
- Import Carrier Statements (Excel Statements) — Full import process overview.
- View Cloud Files — Manage files stored in your cloud environment.
- PDFx — Convert a PDF statement to Excel in Cloud Files before importing it.
- Reconcile Carrier Statement — Type in a short or paper statement (no file upload needed).
Need help? Contact support@commission-tracker.com