Example: Importing an Excel Carrier Statement
This walkthrough demonstrates how to import a carrier statement where the same policy number is used for multiple coverage types (Health, Life, and Dental). It also covers creating missing policies discovered during the import.
Before You Start
This example uses the Duplicate Policy Numbers feature. Verify it is enabled in Options (top menu bar) before following these steps.
💡 Why Use This
Follow this example when:
- You are new to ICS — A step-by-step walkthrough helps you understand the full import workflow before running your first real import.
- Your carrier reuses policy numbers across coverage types — The mapping steps here show how to distinguish duplicates using Policy Type.
- Policies in the file don't exist in your database yet — This example covers the full Create Policies workflow triggered by import errors.
🗺️ How to Access
- Click Carriers in the navigator strip and select the carrier.
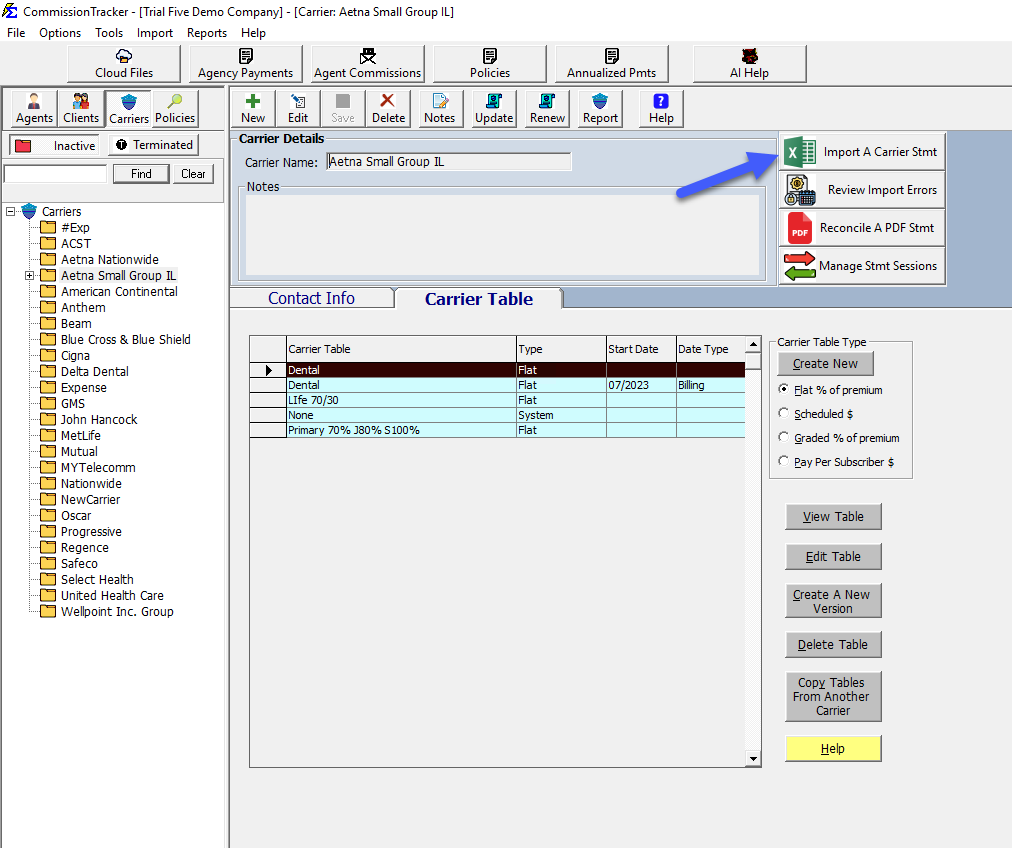
- Click Import Stmt on the carrier's toolbar.
Step 1: Initialize the Import
- Select your carrier from the list.
- Click the Import Stmt button on the carrier's toolbar.
- Upload your statement by selecting an existing file or clicking Paste to upload from your clipboard.
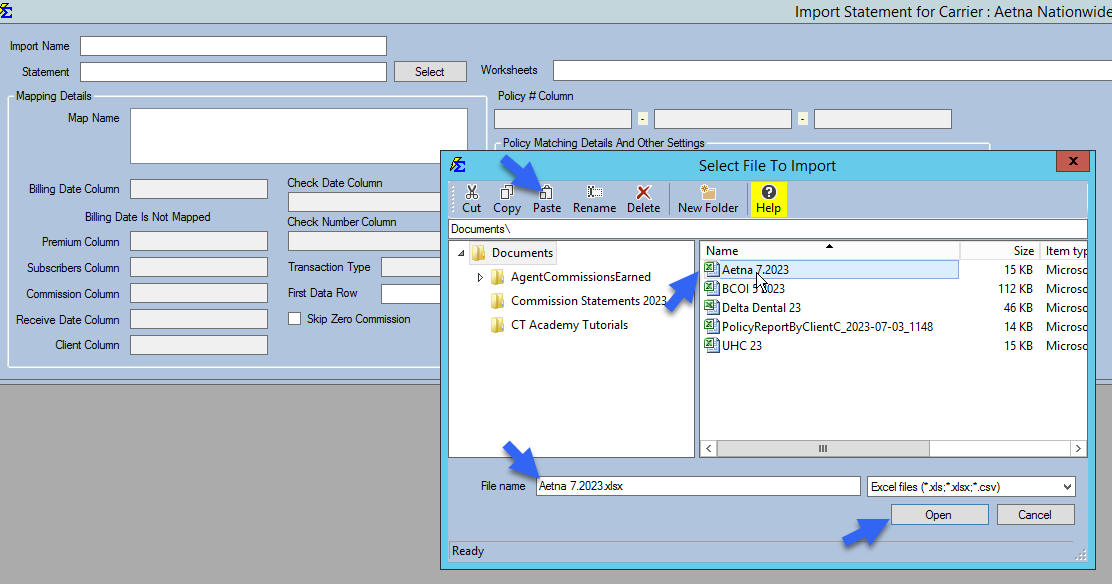
See Selecting a File for Import for Cloud upload instructions.
Step 2: Mapping the Statement
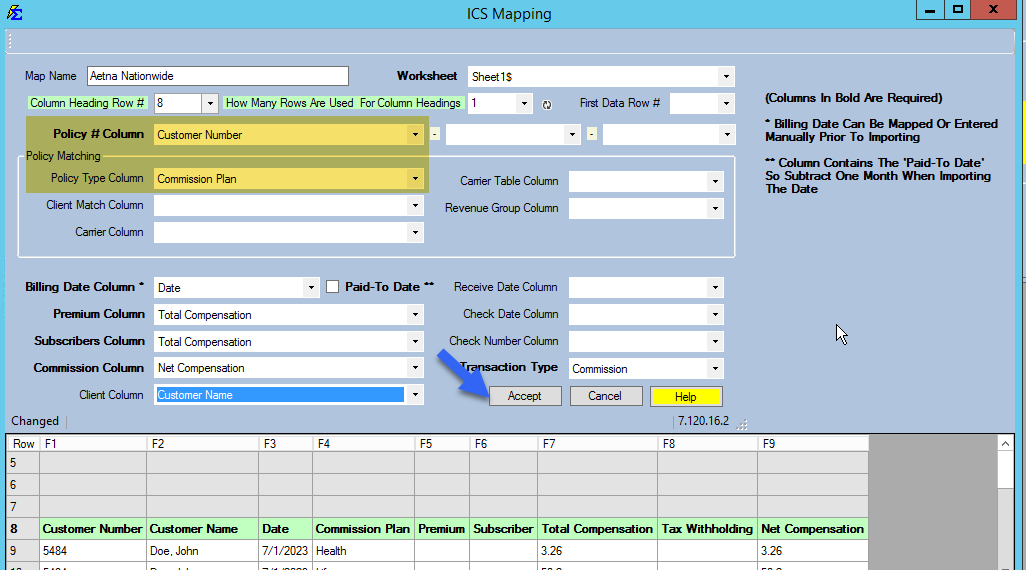
Once the file loads into the lower grid, map the columns so the system knows how to read them.
- Click Add Map.
- Map the Policy # and Policy Type columns — this tells the system to use both values to distinguish between duplicate policy numbers.
- Map the Billing Date, Premium/Subscribers, and Commission columns.
- Click Accept.
Step 3: Validating and Processing
- Enter a Receive Date, Check Date, and Check Number.
- Click Import.
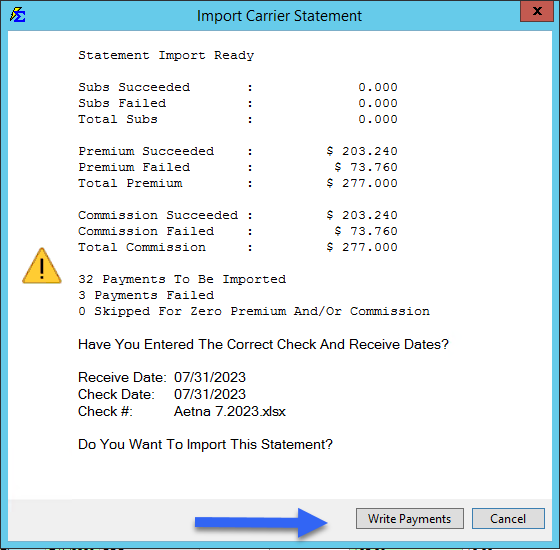
- Review the import summary ("Do You Want To Import This Statement?"). In this example, 3 payments will fail because the policies do not yet exist in the database.
- Click Write Payments. The payments that can post are written, and a second summary opens.
- Click View Errors in that summary to open the error resolution screen.
Step 4: Resolving "Policy Does Not Exist" Errors
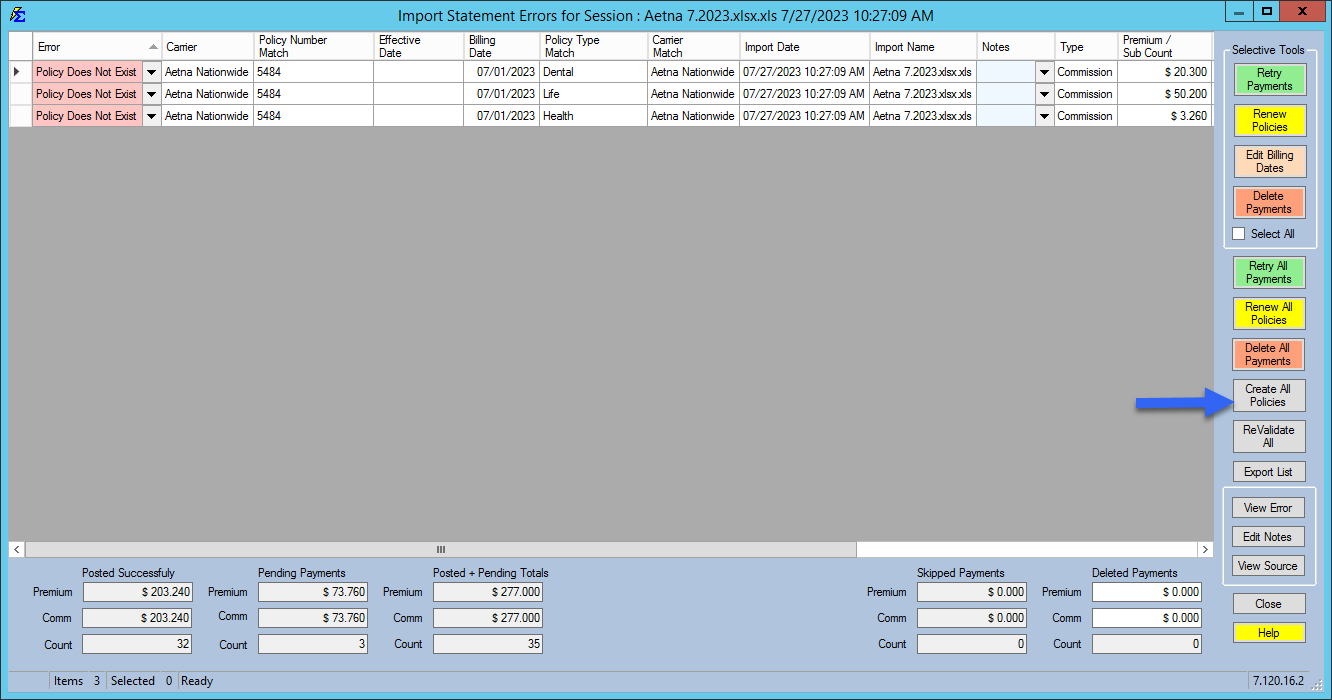
On the Import Carrier Statement Errors (ICSE) screen, you will see the failed payments.
- Review the error codes — they will show "Policy Does Not Exist."
- Click Create All Policies to launch the automated policy creation utility.
- Select your current import session and click OK.
Step 5: Mapping for Policy Creation
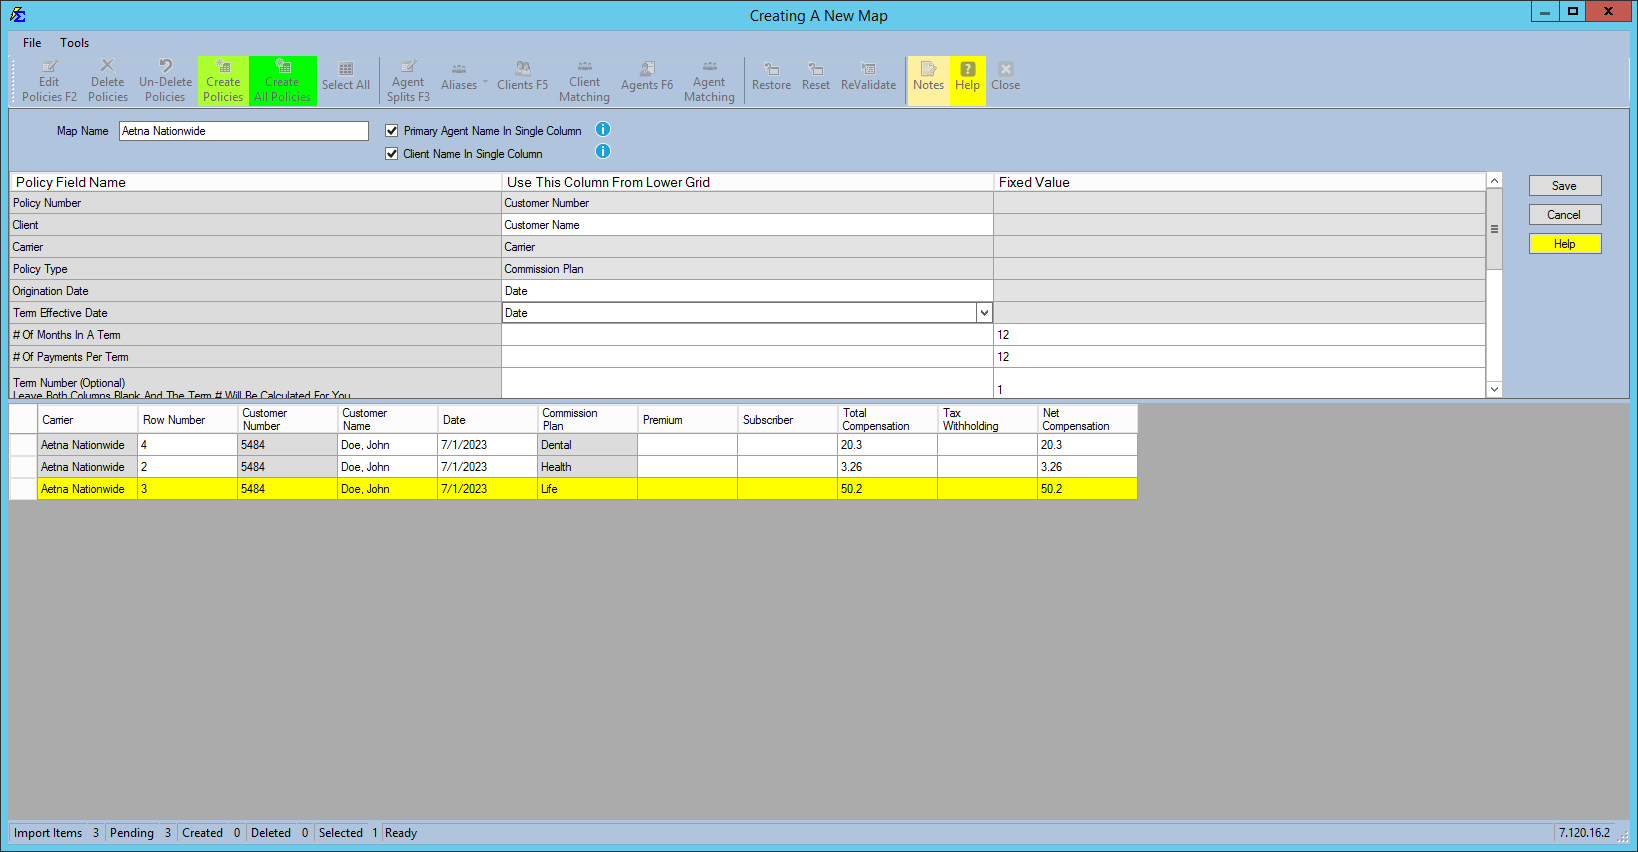
The Create Policies screen opens. Map the columns needed to build a permanent policy record.
- Click Add Map.
- Map the Client Name, Origination Date, and Term Effective Date.
- Click Save. The data populates the upper grid.
Step 6: Refining and Finalizing Policy Records
Before creating the policies, verify the administrative details are correct.
- Double-click a row or click Edit Policies to open the policy editor.
- Adjust the Term Effective Date to match the current active term.
- Set the Primary Agent (if left blank, it defaults to "The House").
- Click Save.
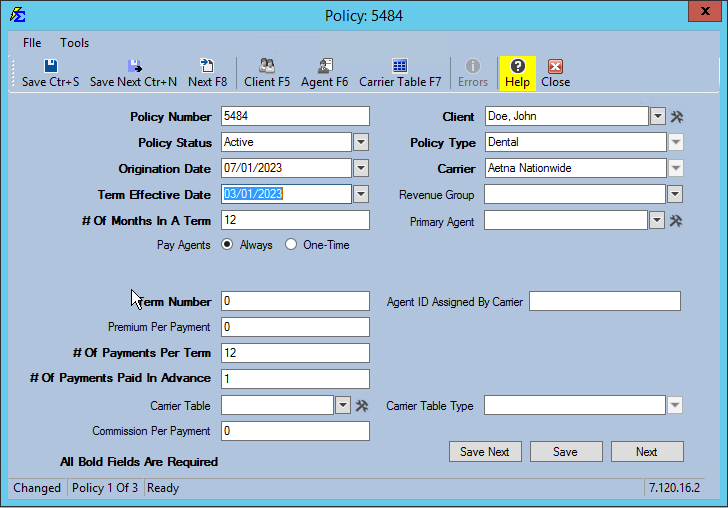
- Once all records look correct, click Create All Policies. The records move from the "Pending" grid into your permanent database.
Step 7: Finalizing Payments
With the policies now in the database, the system can post the payments.
- Return to the Import Carrier Statement Errors (ICSE) screen.
- Confirm the "Policy Does Not Exist" error is no longer listed.
- Click Retry All Payments.
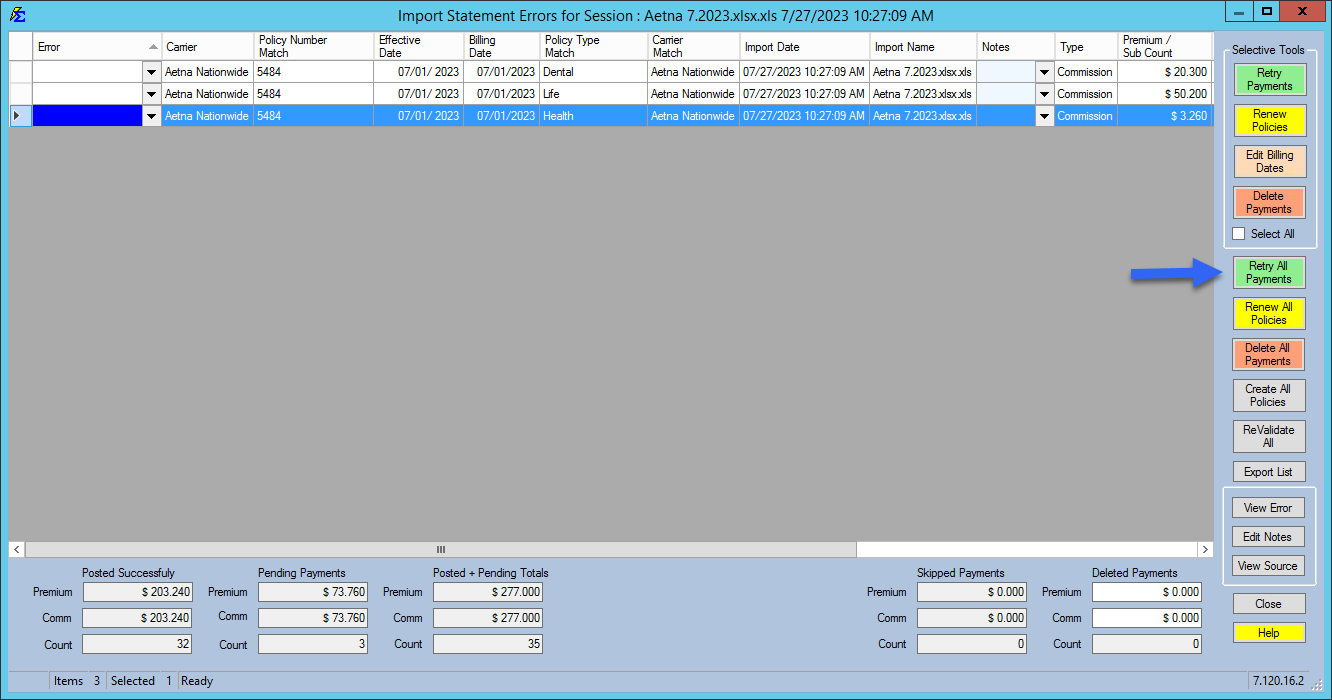
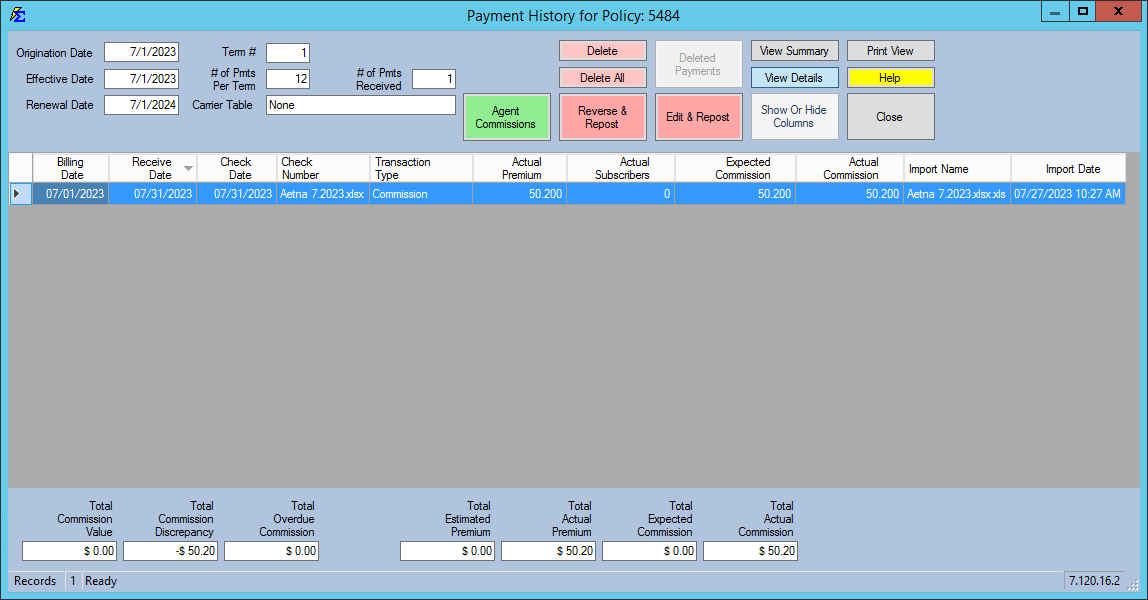
The payments move to the Posted Successfully column. You can verify the new policies and their payment history from the main Policy List.
🔧 Troubleshooting
Payments are still showing as errors after creating policies. Confirm the policy numbers in the newly created policies exactly match the policy numbers in the carrier file. If there is a mismatch (such as a prefix in the file), configure the Policy Number gear to strip the extra characters, then retry.
The wrong Primary Agent was assigned during policy creation. Open the new policy from the Policy List, update the Primary Agent field, and save. Then delete the posted payment from Payment History and retry from the ICSE screen so the commission is recalculated with the correct agent.
I need to undo this entire import and start over. Click Manage Statements on the carrier's toolbar (newer versions: Statement History) to reverse the session. See Manage Import or Reconcile Session. Note that policies created during the Create Policies step must be deleted separately.
🔗 Related Topics
- Import Carrier Statements (Excel Statements) — Full ICS process reference.
- Import Carrier Statement Mapping Gears — Advanced column manipulation options.
- Errors — Import Carrier Statement (ICSE) — Resolve import errors in detail.
- Create Policies — Create policies discovered during an import.
- Duplicate Policy Numbers — Enable and manage duplicate policy number support.
Need help? Contact support@commission-tracker.com