View Cloud Files
Your CT Cloud Account includes dedicated storage that serves as a central hub for carrier statement files and exported reports. The PDFx converter is also located here, allowing you to convert PDF carrier statements into Excel files for import — all without leaving Commission Tracker.
💡 Why Use This
- Stage import files — Upload and organize carrier statement Excel files here before importing them via ICS.
- Convert PDFs — The PDFx converter is built into this screen. Upload a PDF carrier statement and convert it to Excel for import directly from here.
- Retrieve reports — After pulling a report in Commission Tracker, it is saved here for download.
🗺️ How to Access
Click the Cloud Files button on the main Commission Tracker screen.
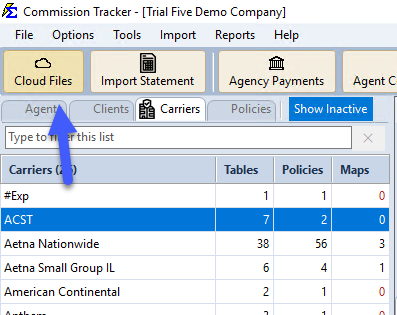
Managing Your Files
- Upload files — Copy from your local PC and paste directly into the Cloud.
- Stay organized — Create custom folders such as "Ready to Be Imported" to manage your workflow.
- Bulk delete — Use Ctrl + Click to select and delete multiple files at once.
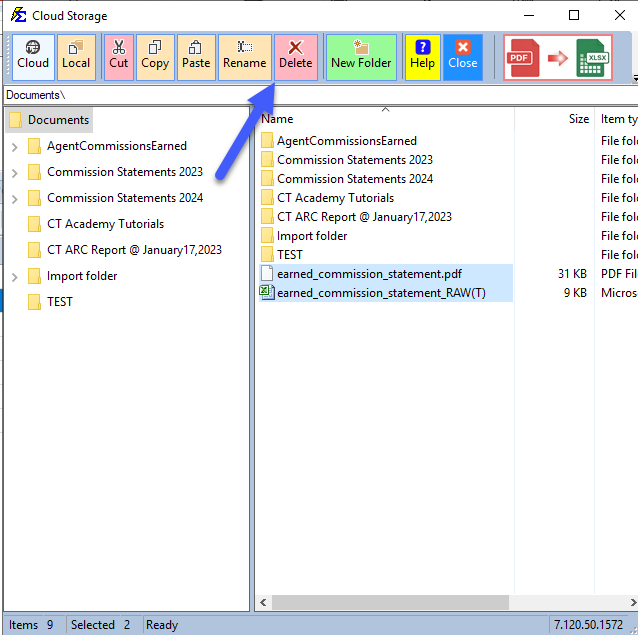
Safe to Delete
Deleting files here does not affect data that has already been imported into the database. Keeping this area tidy makes it easier to find new files.
🔧 Troubleshooting
A PDF carrier statement needs to be converted before it can be imported. Click Cloud Files on the main toolbar. The PDFx converter is located here — paste your PDF into a folder, select it, and click the PDF-to-Excel button at the right end of the toolbar (see PDFx). Once converted, the Excel file is saved next to the PDF in your Cloud Files and is ready to import using Import Carrier Statements (ICS).
I pulled a report but can't find it. Reports exported from Commission Tracker are saved to your Cloud Files automatically. Click Cloud Files on the main toolbar and look for the report file in the root folder or any subfolder you have set as the export destination.
🔗 Related Topics
- Import Carrier Statements (ICS) — Import Excel and CSV carrier statements.
- Key Features & Commission Entry Methods — Overview of all three ways to record commissions.
- Database Backup for Cloud Users — Cloud backup procedures.
Need help? Contact support@commission-tracker.com