Agent Split Template Manager
The Agent Split Template Manager lets you create and manage reusable agent commission split templates for your carrier tables. Instead of configuring the same splits on every carrier table individually, you define a template once and assign it to as many carrier tables as you need. When you update a template, every carrier table using it is updated automatically.
Prerequisite
Before using the Template Manager, ensure you are familiar with the standard Carrier Table Agent Splits logic and have your Agent Levels and Agent Uplines configured if needed.
Training Video
💡 Why Use This
- Consistency: Define your split rules once and apply them across multiple carrier tables. Every table using the same template pays agents identically.
- Efficiency: When commission rates change, update the template in one place — all carrier tables using it are updated instantly.
- Visibility: See exactly which carrier tables are using each template before making changes, so you always know the impact.
🗺️ How to Access
Open the Template Manager by clicking the Manage Agent Split Templates... button on any carrier table's Agent Splits tab. This opens the Template Manager, where you can browse, create, and manage templates, then select one to assign to the carrier table you came from.
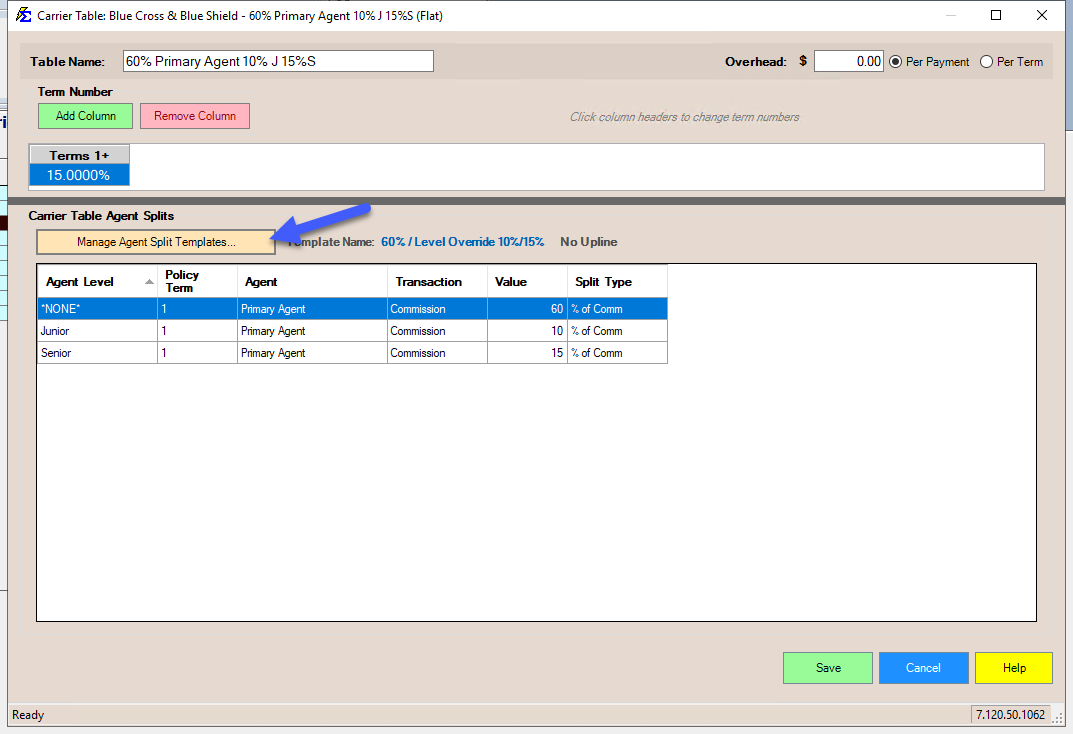
Understanding the Layout
The Template Manager screen is divided into two main areas:
Left Panel — Template List
- Shows all available templates by name.
- Displays the number of carrier tables currently using each template (e.g., "3 tables").
- Click [View..] next to any template to see exactly which carrier tables are using it.
Right Panel — Split Preview
- Displays the agent commission split rows for the currently selected template.
- Columns include: Agent Level, Year, Agent, Transaction Type, Value, and Split Type.
- This is a read-only preview — use the buttons below the panel to add, edit, or delete split rows.
A summary bar at the bottom shows the total number of templates and carrier table assignments across your system.
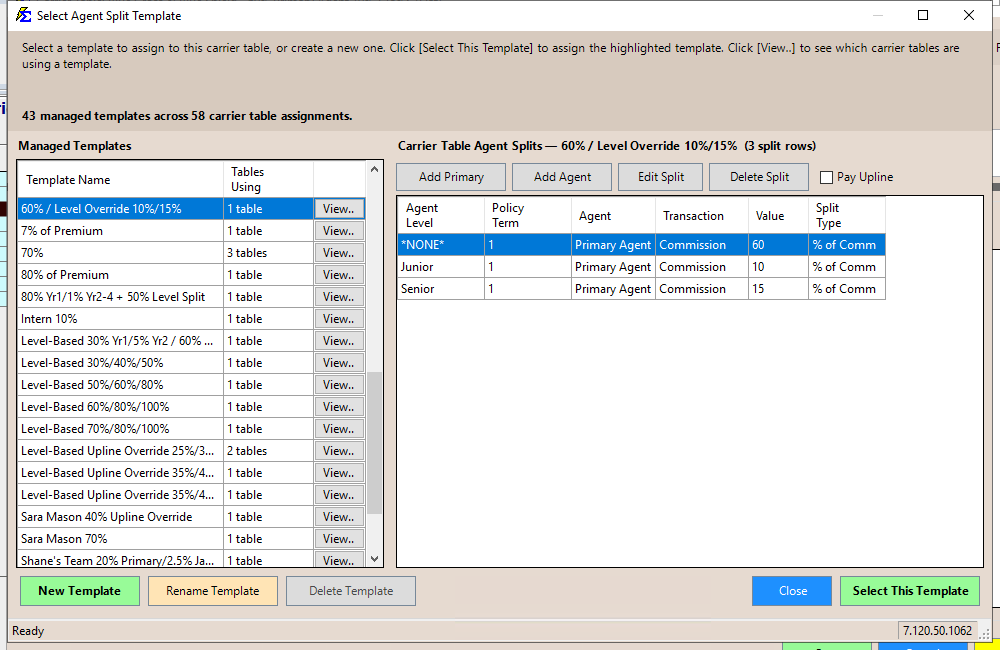
Viewing Which Carrier Tables Use a Template
Click the [View..] button next to any template to open a popup listing every carrier table that uses it. The popup shows:
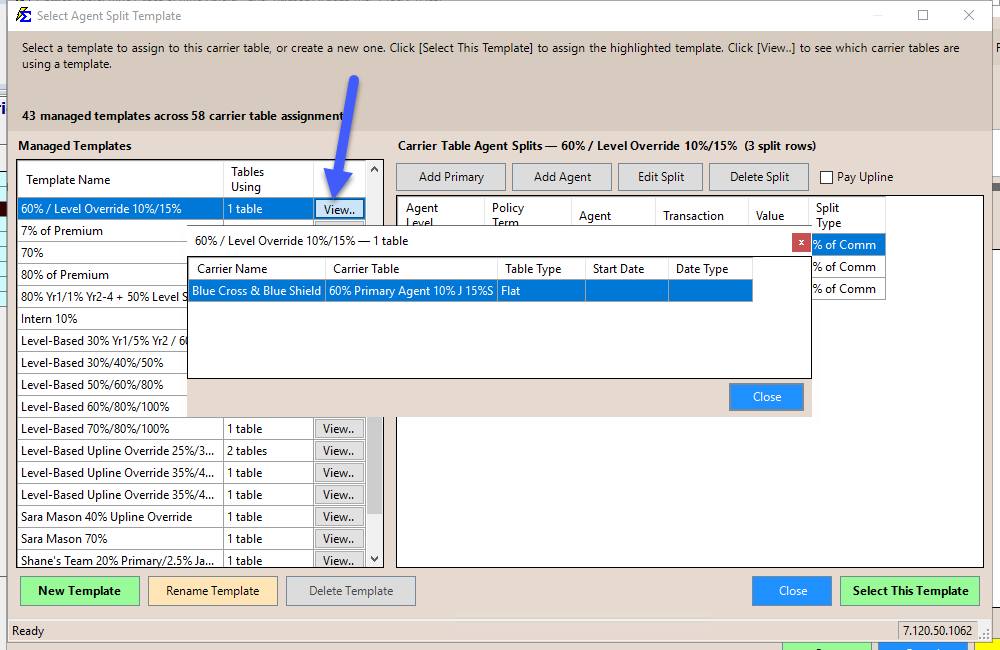
- Carrier Name — the carrier that owns the table.
- Carrier Table — the table name (e.g., "Dental", "Life").
- Table Type — Flat, Scheduled, Graded, or PPS.
- Start Date and Date Type — for versioned tables.
This helps you understand the full impact before making changes to a shared template.
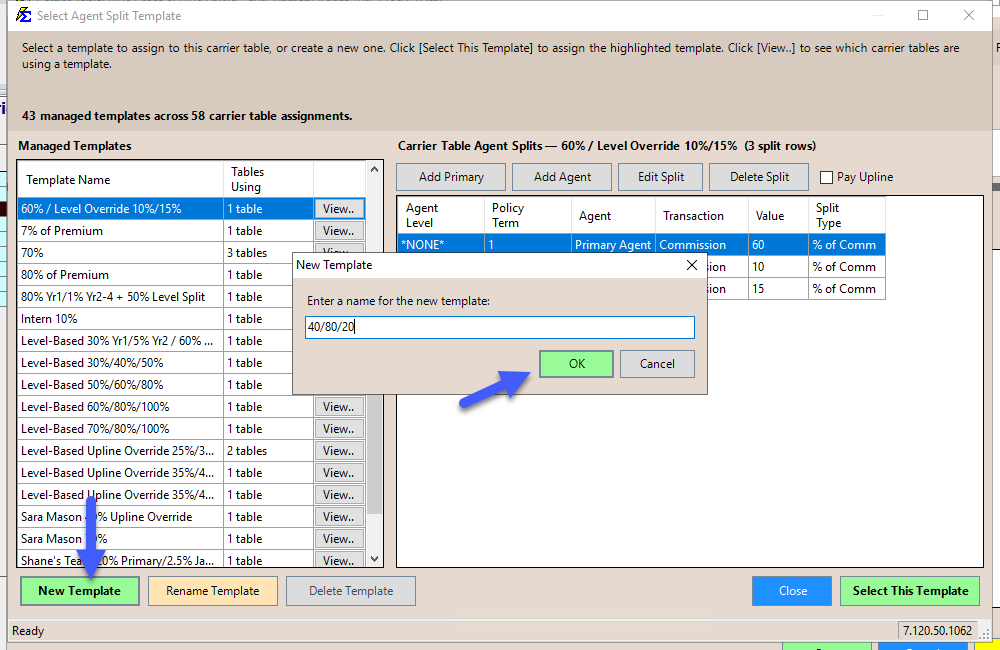
Creating a New Template
- Click the New Template button.
- Enter a unique name for the template in the dialog that appears.
- Click OK — the template is created with no splits.
- Add splits using the Add Primary or Add Agent buttons (see Managing Splits below).
Template Names Must Be Unique
Every template name must be unique across your entire system — including templates used for different purposes. If the name is already taken, you will be asked to choose a different one.
Renaming a Template
- Select the template in the left panel.
- Click the Rename Template button.
- Enter the new name in the dialog.
- Click OK to save.
Renaming a template does not affect its splits or any carrier table assignments — it simply updates the display name everywhere.
Deleting a Template
- Select the template in the left panel.
- Click the Delete Template button.
- Confirm the deletion when prompted.
Templates In Use Cannot Be Deleted
If a template is currently assigned to one or more carrier tables, the Delete button is disabled. You must first reassign or remove the template from all carrier tables before it can be deleted. Use the [View..] button to see which tables still reference it.
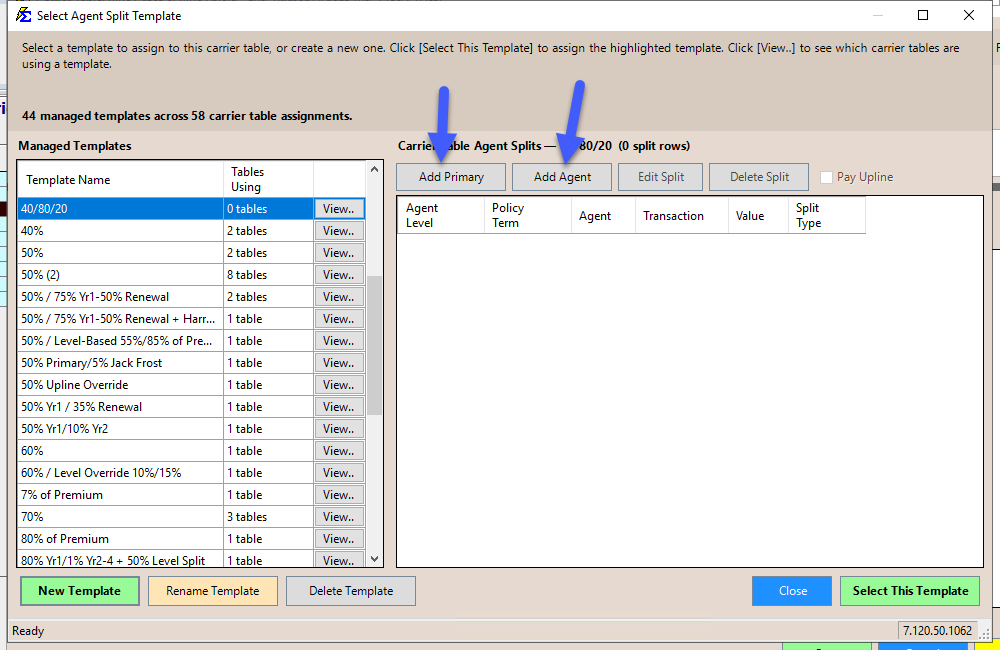
Managing Splits on a Template
Adding Splits
- Add Primary — Adds a split row for the Primary Agent on the policy. The Primary Agent is determined by who is assigned as the primary on each individual policy.
- Add Agent — Adds a split row for a specific named agent. Use this for manager overrides, referral fees, or any agent who should receive commission regardless of who the Primary Agent is.
After clicking either button, a dialog appears where you can configure the Agent Level, Year, Transaction Type, Value, and Split Type.
Editing a Split
- Select a split row in the right panel.
- Click the Edit Split button (or double-click the split row).
- Modify the values in the dialog and click OK.
Deleting a Split
- Select a split row in the right panel.
- Click the Delete Split button.
- Confirm the deletion when prompted.
Shared Templates Affect All Carrier Tables
If the template you are editing is used by more than one carrier table, a warning message will appear before any changes are saved. Changes to a shared template affect every carrier table that uses it. Use the [View..] button to review the impact first.
Using Uplines
The Use Uplines checkbox controls how agent levels are resolved for the splits on a template:
- Checked — Splits are assigned based on each agent's upline hierarchy. The agent's upline (e.g., manager, recruiter) at each level receives the override automatically.
- Unchecked — Splits are assigned based on fixed agent level assignments only.
This setting applies to all splits on the template. Changing it will affect every carrier table using that template.
Learn More About Uplines
For a detailed walkthrough on setting up upline hierarchies, see Carrier Table Agent Splits: Agent Uplines.
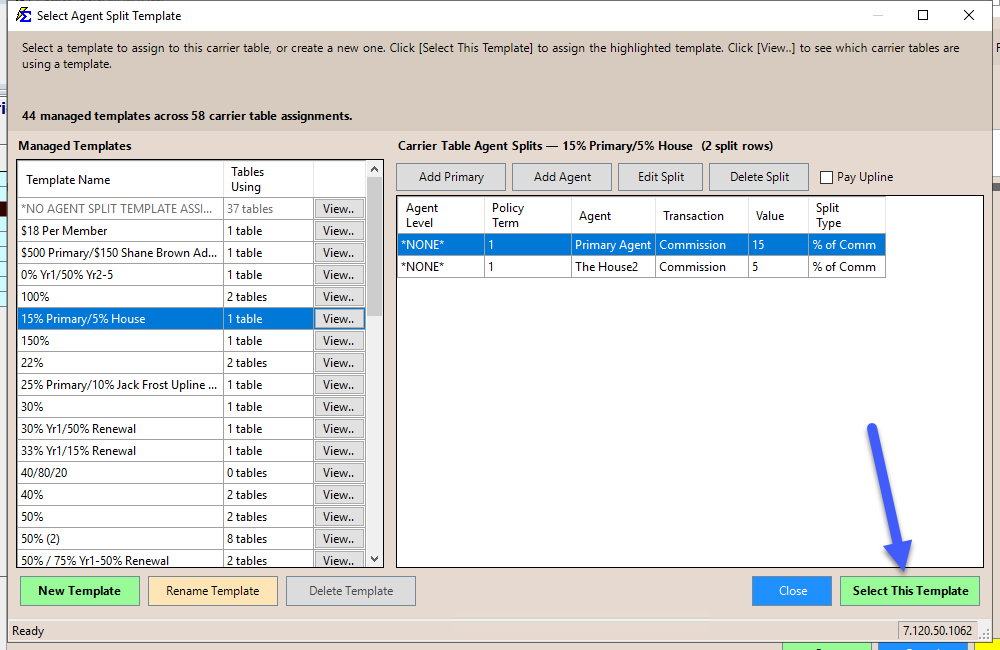
Assigning a Template to a Carrier Table
The Template Manager opens with a Select This Template button at the bottom:
- Browse the template list to find the template you want.
- Click on it to preview the splits in the right panel.
- Click [View..] to verify which other tables share this template.
- Click Select This Template (or double-click the template row) to assign it to your carrier table.
Removing a Template Assignment
To remove a template from a carrier table (so no agent splits apply), select the NO AGENT SPLIT TEMPLATE ASSIGNED row at the top of the list and click Select This Template.
Create New Templates Here
If none of the existing templates match what you need, click New Template, add your splits, and then select it — all without leaving the Template Manager.
How Templates Work During Payment Processing
When Commission Tracker receives a payment, the system:
- Identifies the Carrier Table assigned to the policy.
- Looks up the Agent Split Template assigned to that carrier table.
- Uses the template's split rules to calculate each agent's portion of the commission.
- Records the results for the Agent Commissions Earned report.
If no template is assigned (the carrier table shows "No Agent Split Template"), then no agent commissions are calculated for that table — 100% stays with the agency.
Policy-Specific Splits Take Priority
If a policy has a Policy-Specific Agent Commission Split Table configured, that takes priority over any carrier table template. The template is only used when no policy-specific split exists.
🔧 Troubleshooting
I edited a shared template and the splits changed on carrier tables I didn't intend to change. Changes to a shared template affect every carrier table using it immediately. Always click [View..] before editing to see which tables will be impacted. If needed, create a separate template with a unique name for tables that require different splits.
I need one carrier table to have its own independent splits, not shared with any other table. Create a new template with a unique name, configure the splits you need, and assign it to that carrier table. Each template is independent — changes to one never affect another.
I renamed a template and now I can't find it. The name changes everywhere it appears, but all carrier table assignments and split rules remain exactly the same — only the label is updated.
The Delete button is disabled. The template is still assigned to one or more carrier tables. Click [View..] to see which tables reference it, then reassign or remove the template from those tables before deleting.
🔗 Related Topics
- Carrier Table Agent Splits — Standard split setup at the carrier table level.
- Carrier Table Agent Splits (Using Agent Levels) — Automate splits based on agent rank.
- Carrier Table Agent Splits (Using Agent Uplines) — Pay managers via agent hierarchy.
- Create Carrier Commission Tables — Overview of carrier table setup.
- Carrier Commission Table Versions — Manage rate changes over time.
- Agent Commission Splits — Overview of all split methods.
Need help? Contact support@commission-tracker.com